Upgrading Your RV with Solar Energy Power

In today's world of RVing, solar power has become a game changer. Not only does it provide a sustainable energy source, but it also allows RVers to enjoy the great outdoors without relying on traditional power sources. In this guide, we’ll dive into the process of upgrading an RV with solar panels, focusing on components, installation, and the benefits of harnessing solar energy.
Understanding the Components of a Solar System
Before diving into the installation process, it’s crucial to understand the components that will be part of your solar system. This includes solar panels, inverters, converters charge controllers, batteries, and connectors. We recommend installing a Victron system due to high quality standards, range of features, and the ability of the components to communicate with each other.
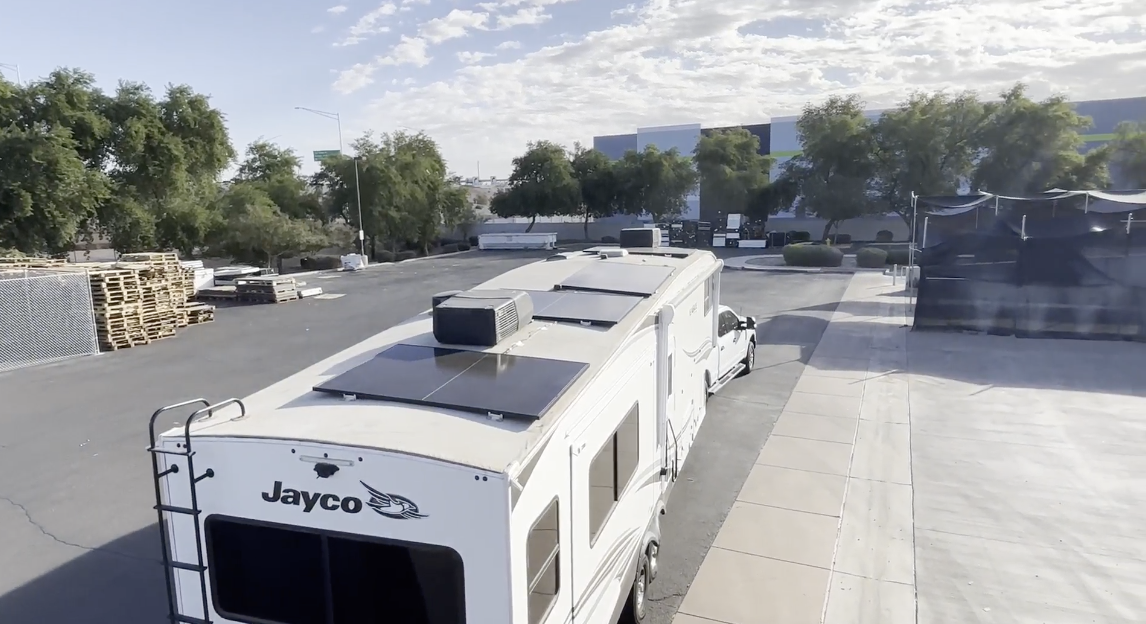
- Solar Panels: Solar panels are essential for capturing sunlight and converting it into electricity. RV roof space is the biggest limitation when installing solar on RV’s. Seems like you can never have too much solar when it comes to RV’s. We replaced the existing small 100W panel with 4 of the 410W Znshine solar panels. This gives us 1640W, with future additions possible to add more wattage by filling in any remaining spaces.
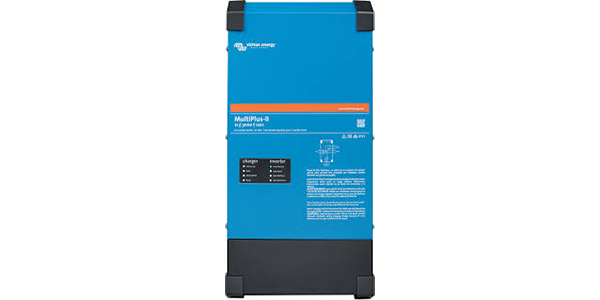
- Inverters: These convert the DC electricity generated by the solar panels into AC electricity that can power your appliances. Two Victron 24V 3000VA Multiplus inverters were used to give us 6000VA of total power. Two inverters also allow us to properly provide power to a 50A service panel. For a 30A service panel, one inverter would suffice. These inverters come in 12V, 24V, and 48V. Many installations use 12V inverters due to RV’s having 12V systems. However, 24V or 48V inverters pull less amps requiring smaller cabling. You can add a DC-to-DC converter to provide power to your 12V appliances. This will be covered below. There are different ways to set these inverters up that we will get into more details in future videos. We chose to put them in same phase parallel to supply 120V power only. For this application, a 240-power source was not needed.
- Charge Controllers: These devices regulate the voltage and current coming from the solar panels to the batteries, ensuring they are charged efficiently. Another benefit of a 24V or 48V system is that you can use smaller or fewer charge controllers. As an example, a 40A charge controller will output about 540W at 12V but 1080W at 24V. In our case, we were able to use a 70A charge controller instead of a 100A charge controller.
- DC to DC Converters – DC to DC converters can be used for multiple purposes including the powering 12V devices from a 24V system and vice versa and providing a stable DC output for sensitive equipment. For this application, we needed to take the 24V of the system and change it to 12V to power all our 12V loads in the RV.
- Batteries: In an RV solar system, the batteries serve as the storage unit for the electricity generated by the solar panels, allowing you to use power even when the sun isn't shining, essentially acting like a "power bank" to access energy at any time, especially during cloudy days or nighttime when the panels aren't producing electricity. We chose 2 of the EG4 24V 200A LL-S series rackmount batteries, which are 24-volt batteries that store the electricity generated by the solar panels for use when needed. They have built in power switches and circuit breakers, so we were able to reduce the amount of additional equipment.
Installation Process
Now that we have a grasp of the components, let’s walk through a brief overview of the installation process. Future videos will break up the installation process into smaller more in depth segments of each component.
Preparing for Installation
Before starting the installation, having the right tools and materials is essential. Here is a list of some common items that will be needed to complete the job:
- MC4 crimpers and Wire Crimpers - Using the right crimping tools is critical to ensure a secure connection. Bad or loose connections will lead to high resistances which cause buildup of heat and could potentially lead to damaging equipment and even in some cases cause a fire.
- Tools such as drills, socket sets, screwdrivers, multimeters, and torque wrenches.
- Tightening to proper torque settings is crucial because it ensures a secure connection without damaging the components, preventing issues from vibrations, and premature failure by maintaining the correct clamping force on a joint
- A multimeter is an essential tool to ensure you are getting the proper volts and amps from your equipment.
- Mounting hardware for panels
- Wiring and Connectors
- Miscellaneous installation items such as wire splices, junction boxes, zip ties, etc.
Placing the Solar Panels
Justin, our installer, prepped the frames with Z brackets and used a forklift to lift the solar panels for easier access. We arranged the solar panels in a configuration of two panels in series and two strings in parallel. This setup is designed for even distribution of power, which in this case, is more efficient than connecting all panels in series. If one panel on a string is shaded, all panels on that string will be impacted as well. Creating multiple strings helps minimize the loss due to shading. Shading is an issue on RV’s due to roof obstacles such as AC units, fans, and surrounding environment such as trees.
Connecting the Solar Panels
All the connections were made between the panels. MC4 connectors were crimped onto PV wire and then checked to make sure the crimp was good, and connectors were on tight.
Securing the Installation
Final adjustments were made by connecting the inline fuses and ensuring they were tucked under the panels, which helps keep everything organized and prevents wear and tear. Maintaining airflow around the panels is crucial, so we allowed for about an inch of space between the panels and the roof.
Next, we used RV roof tape, which is weatherproof and waterproof, to secure the cables. This tape will prevent the cables from moving around, which can lead to damage over time. Additionally, we applied Dicor self-leveling sealant on the brackets and bolt heads to protect against moisture and corrosion. Dicor was applied before and after lag screws were attached to roof.
Installing Electrical Components
After securing the panels, we moved on to install the electrical components in the RV's garage area.
Installing Victron Inverters
Justin began by placing two Victron Multiplus inverters. Each inverter has a mounting plate that secured to the wall. The inverter is placed onto the bracket, then secured below to hold it in place. It’s important to ensure everything is measured and positioned correctly before installation to avoid reworking later.
Installing Junction Box and AC connections to inverters
A junction box is mounted, evenly between the inverters, to house all the AC connections to the inverters. Electrical wires are routed from the box to both the AC input and output of each inverter. Since we are putting the inverters in a parallel configuration, it is important to ensure all cables lengths are the same.
Connecting the LYNX Distributor
Next, we mounted the Lynx distributor evenly between the two inverters. The LYNX distributor is a 1000a fused bus bar that connects all DC equipment to a central location. Each device has its designated fuse, which enhances safety and efficiency. The battery inputs of the inverters were then connected to the LYNX distributor. Size the cable length and fuse size according to factory recommendations.
Adding the Charge Controller, Cerbo GX, and DC to DC converter
The remaining Victron components were mounted and connected to the Lynx distributor. Always refer to the manuals for proper cable and fuse size.
Final Connections and Testing
Once all components were installed, it was time to make final connections.
- Solar panels were connected to the charge controller. Be sure to use a DC disconnect and that the DC disconnect is turned off when making the solar connections. Typically, with DC disconnects, they will be installed near the charge controller and be connected to both the positive and negative wire of the solar array.
- The DC-to-DC converter was wired into the 12V fuse box of the RV using a junction box to tie into the RV’s wiring.
- The smart shunt was connected to the negative post of the Lynx Distributor. This device monitors the charge and discharge of the batteries, providing vital information about the batteries state of charge.
- Finally, these components along with the inverters are connected to the Cerbo via VE direct and RJ45 communication cables. This allows the Cerbo GX to monitor and control the system.
Installing the Batteries
We used metal brackets to secure the batteries in place. It's essential to make sure these heavy batteries are stable and won’t shift during travel. The batteries were connected in parallel to maintain a 24-volt system. The final step was to connect the batteries to the positive and negative post of the Lynx Distributor. Be sure that all DC loads go through the shunt and that none are connected directly to the battery. Loads connected directly to the battery will not be seen by the shunt and thus the state of charge of the batteries will not be accurate.
- Note: The batteries have built in circuit breakers and power buttons. We chose not to include additional fuses and disconnects. These items can be added to the install if desired.
Configuring the System
After securing the batteries, Justin configured the Multiplus inverters for smooth communication between all components. This setup is essential for ensuring that the system operates correctly. Victron uses Victron connect, VE configure, and VE quick configuration to program the inverter and other components. Individual component configuration will be covered more in depth in future videos.
Monitoring the System
With everything installed and connected, we integrated the Touch 50 monitoring system. This device provides real-time data on the system's performance, including battery levels and power generation. Monitoring is crucial for maintaining the optimal functioning of your solar system. We purchased HDMI and USB extenders to install the LCD display further away from the Cerbo.
The Benefits of Solar Power in Your RV
Upgrading your RV with solar power offers numerous advantages:
- Independence: You can camp in remote locations without worrying about power sources.
- Cost Savings: While the upfront investment can be significant, the savings on fuel and generator maintenance over time can be substantial.
- Eco-Friendly: Solar power is a renewable energy source, reducing your carbon footprint.
- Quiet Operation: Unlike generators, solar panels operate silently, allowing for a more peaceful camping experience.
Conclusion
Installing a solar power system in your RV can enhance your camping experience significantly. With the right components and installation process, you can enjoy the freedom of the open road while harnessing the sun's energy. Whether you are a seasoned RVer or just starting, upgrading to a solar system is a worthwhile investment.
Thank you for exploring this guide on upgrading your RV with solar power. We hope you found it informative and helpful for your own solar installation project! stay tuned for future videos on this series!
WATCH THE FULL INSTALL HERE!


